# Properties
After creating a Development, you can add all its properties, by clicking on the Properties tab.
By default, new properties are New build, but if you change one of them to resale, it is automatically removed from the development and moved to the Independent units.
# On this page
# Adding properties
With the Properties tab open from the development page, to create a new property, click '+ ADD NEW' button. This will open up the New property form and you must fill in the required details in the six sections. Some details are optional, although they are part of 100% of the information.
To help fill in the property details, the percent complete of each section is shown on the left, which allows you to quickly access a specific section.
You can insert multiple similar properties at a time by specifying several property numbers. For a range of numbers, use curly brackets and a hyphen. Separate each property number or range with a comma. Example: A{1-3}, B2, B7, C{14-16} will insert properties with numbers: A1, A2, A3, B2, B7, C14, C15, C16. Once you have inserted them, you can also bulk edit them, by selecting and entering the properties details.
# Basic information section
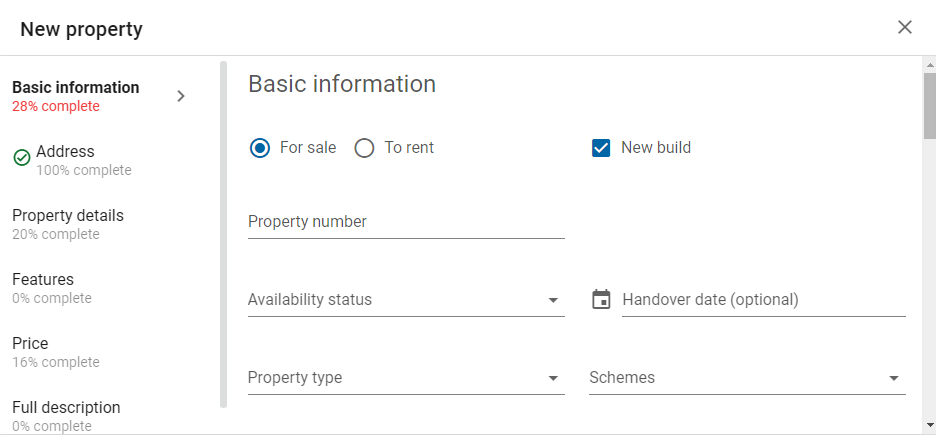
There are four options for setting the property availability status:
- For sale
- Coming Soon
- Sale under Offer
- Sold
The most common schemes are:
- Shared Ownership: Scheme that allows buyers to own a share and then rent the part they don't own at a reduced rate.
- Help to Buy - Equity Loan: Scheme that offers an equity loan where the government lends money to buy a newly-built home
- Discount Market Sale: Low-cost home ownership product where a housing provider offers a discount on the purchase of a new build property.
- First Dibs: Scheme to ensure that new, lower-cost homes in the capital are marketed and sold exclusively to Londoners and UK-based buyers first.
- Rent to Buy: Scheme that allows you to rent a property for less than the market price for a set amount of time, in which you are expected to use the money saved from the lower rent for a deposit to buy the property after the tenancy ends.
Properties usually are related to a single scheme, but sometimes they can be sold under more than one scheme, like the case of Help to Buy and First Dibs.
# Address section
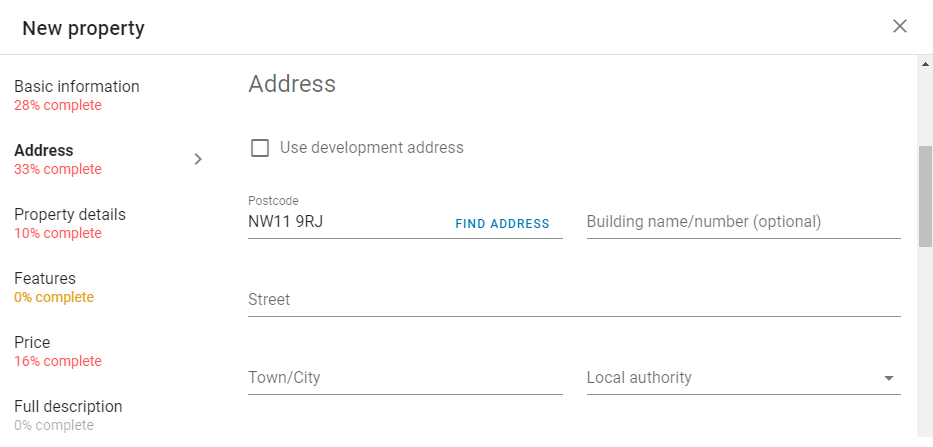
Check 'Use development address' box, to get it from development.
To help you auto-complete the information, enter the postcode and use the 'FIND ADDRESS' button, when you enter the address manually.
# Property details section
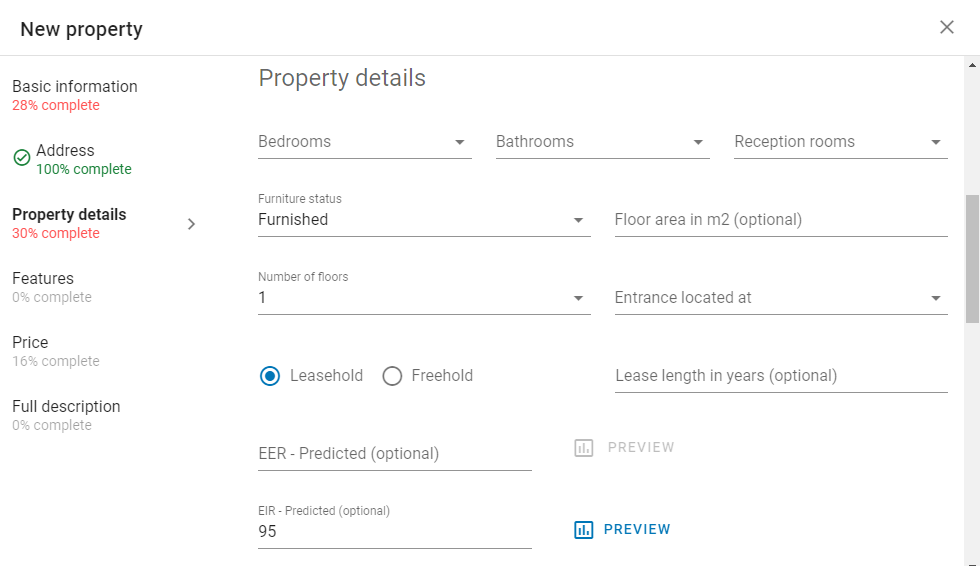
Select the number of bedrooms, bathrooms and reception rooms, as well as, furniture status, number of floors and entrance locate for the property from the drop down lists. Other optional fields can be filled.
# Features section
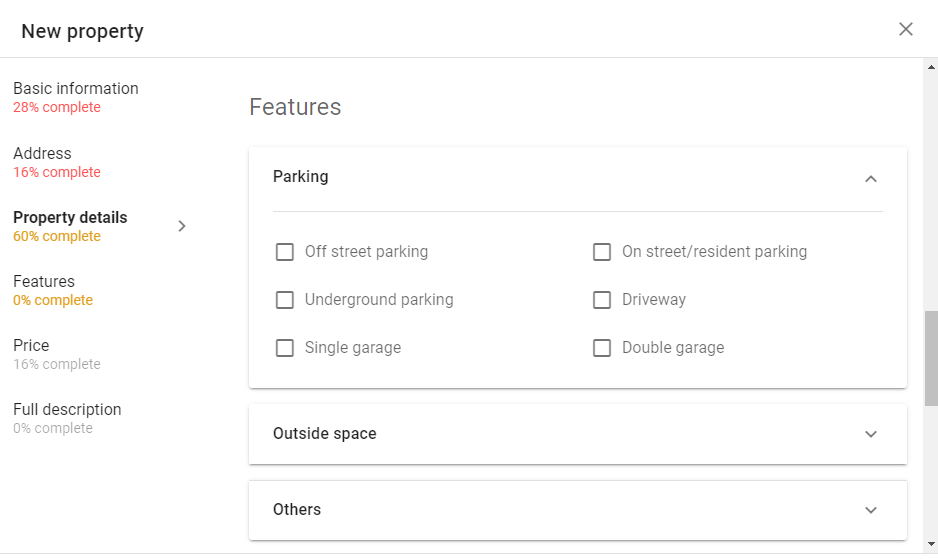
In this section, you can select additional information related to parking, outside space and others such as, wheelchair accessible, central heating and lift access.
# Price details section
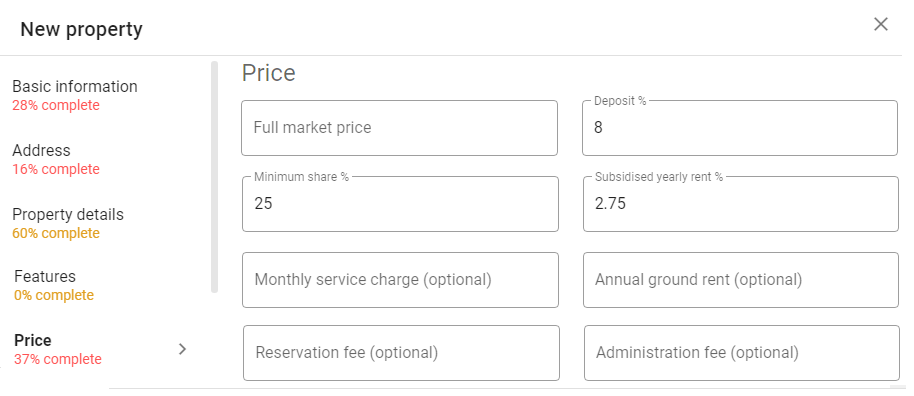
In this section, some values may appear as default, if they were set in Settings.
# Full description section
Use this section to write your detailed description of the Property. You can use bold and bullet point styling options.
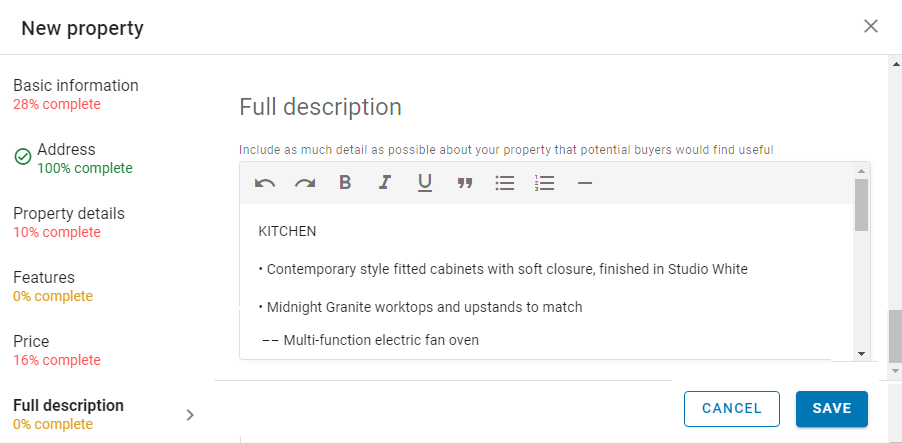
The colour of the letters in the percentage of complete also will reflect the required level, the sections in red being mandatory filling until they at least turn yellow.
You don't need to include every detail right away, but some details like Property number, Availability status, Property type, Schemes, Price and others, are required.
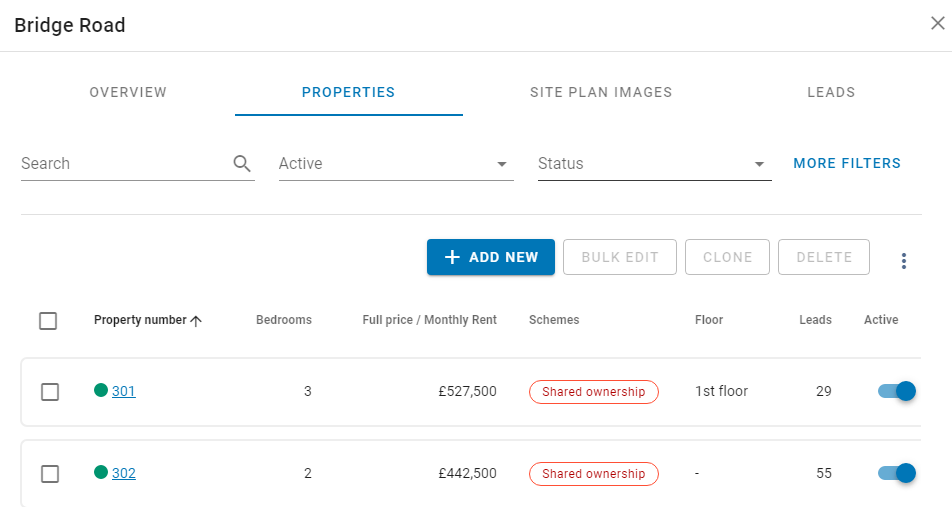
When you have added properties to the development this page will list all of those properties. Using the quick Search options, you can find them faster, filtering by Multi-field search, Active, Status, Bedrooms and Schemes.
You can sort the created properties by number, bedrooms, price, schemes, floors, leads or active condition.
# Overview
After creating a property the main details, such us, name of development and number, scheme, features and activation status, are shown on the Overview tab. You can also activate and deactivate the property, by selecting this option.
Information and shortcuts are also displayed for Eligibility rules, Priority rules and Floorplans tabs.
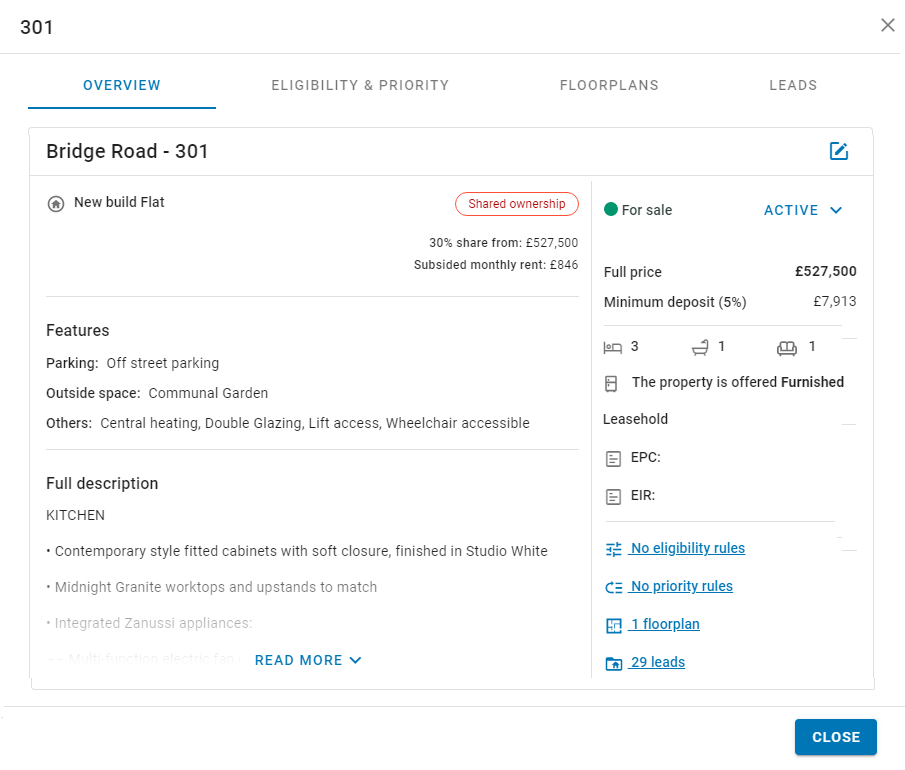
You can edit and change the property details, by clicking on the 'edit' icon. You can also move the property to a Independent unit by switching from 'New build' to 'resale', but, by doing that you will need to enter the name for the independent unit. Click on the proposed name link if you want to use it.
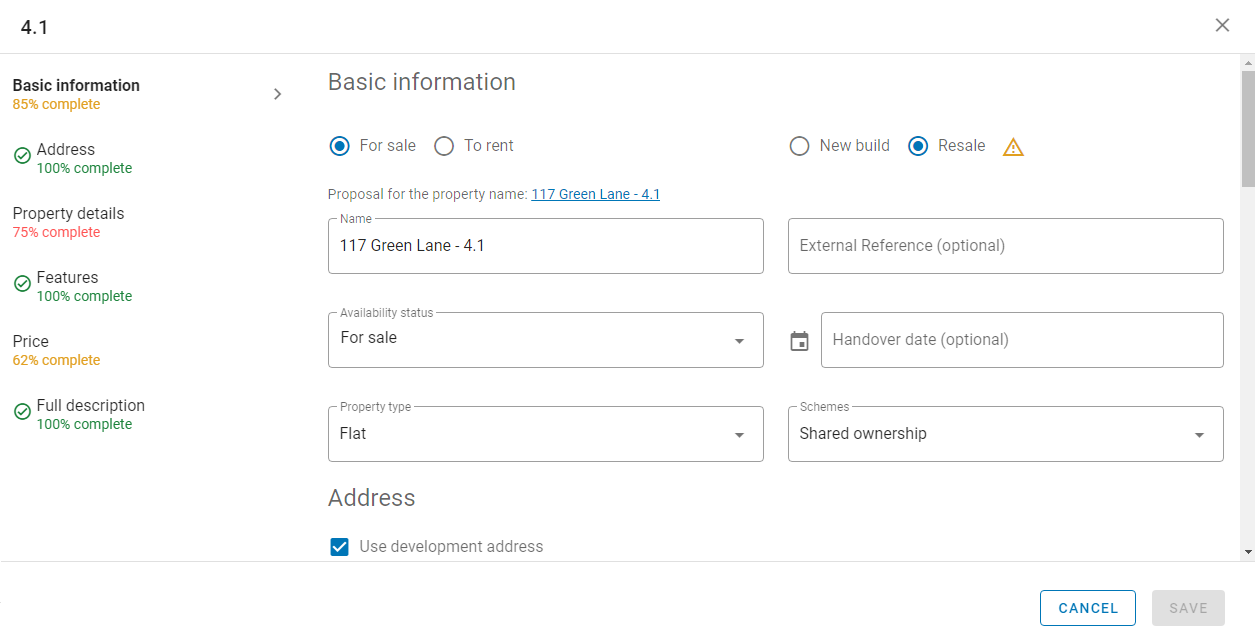
When you edit a property, a 'resale' new option will be available, by selecting it automatically becomes an independent unit. This in an irreversible action.
# Eligibility and priority rules
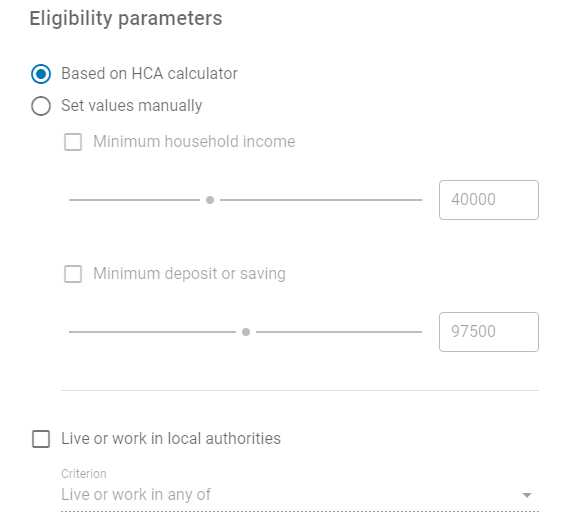
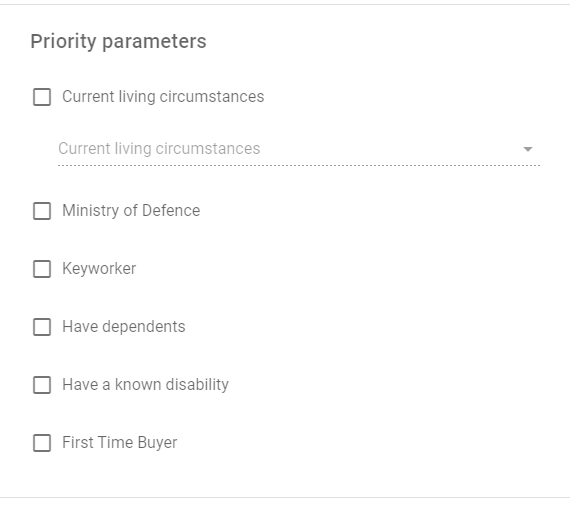
Most listed properties are subject to eligibility rules, which means that home seekers must fulfill some criteria to be able to purchase or rent properties. In this tab you can define the eligibility and priority rules that apply to a property.
Applicable rules depend on the scheme, and they can be added to Listings and Properties, although some rules can be omitted for properties.
As explained in the introduction to this Inventory section, the eligibility rules are related to income, where the applicant lives and works, among others. While the priority rules are oriented to whether the home seeker or applicant is a first time buyer, if they have disability, among other priorities.
| Eligibility rules | Priority rules |
|---|---|
 |  |
After selecting the rules that apply, they will be displayed in the Eligibility and Priority tab.
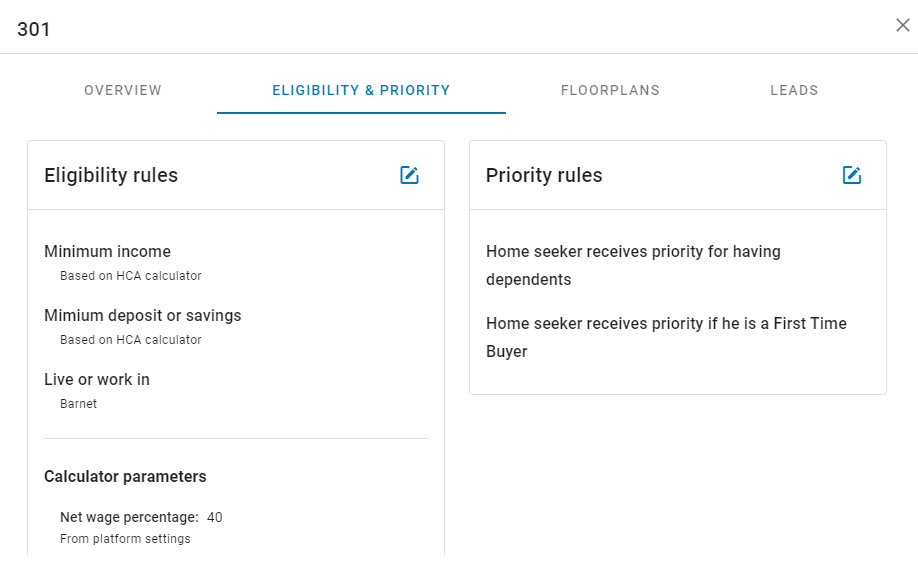
You can change the rules, by clicking on the 'edit' icons.
# Floorplans
Images are presented in their original sizes, but a thumbnail with a maximum width of 360px is also produced and returned.
You can drop or upload the image, and click on 'INSTRUCTIONS' button to see specifications.
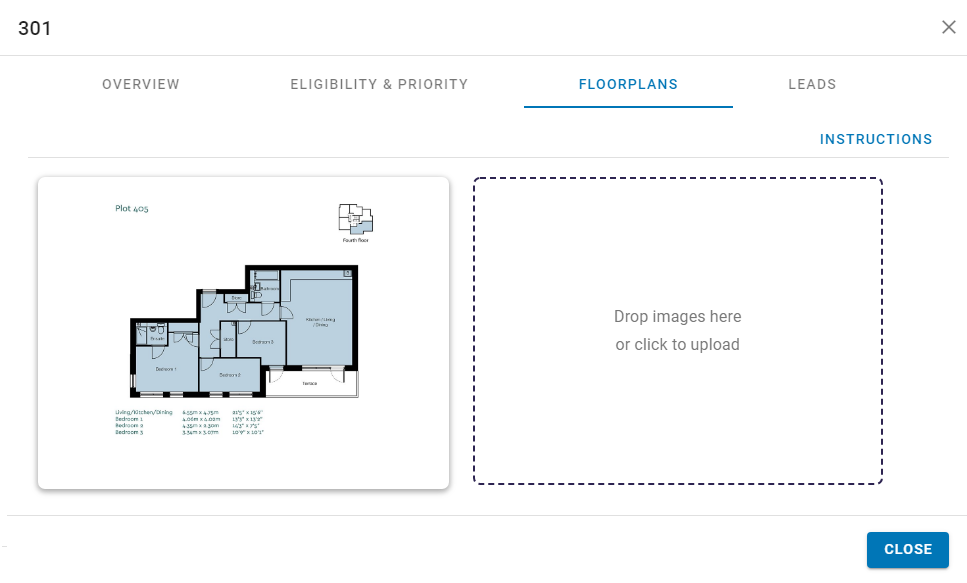
By positioning the cursor over the image, the 'edit', 'delete' and 'magnifying glass' icons will be shown to perform these actions.
# Leads
You can use the Search options at the top of the page, to look for a specific Leads, by filters Multi-Field search, Source, Eligibility status, Create from and Create to.
You can also sort ascending and descending by each column of information displayed in the list of leads.
All Leads details can be displayed on the Leads option in the KPro Marketing side navigation bar.
# Bulk edit
Several properties can be edited at once, you must select all the properties you want to edit, and click on the 'Bulk edit' button.
Bulk edit only allows update eligibility and priority for properties sharing the same scheme.
As can be seen in the figure below, this option allows you to instantly edit the same information in all the selected properties, without having to do it one by one. You can do this for the details in the Basic information, Price, Property details, Property features, and Full description property information sections.
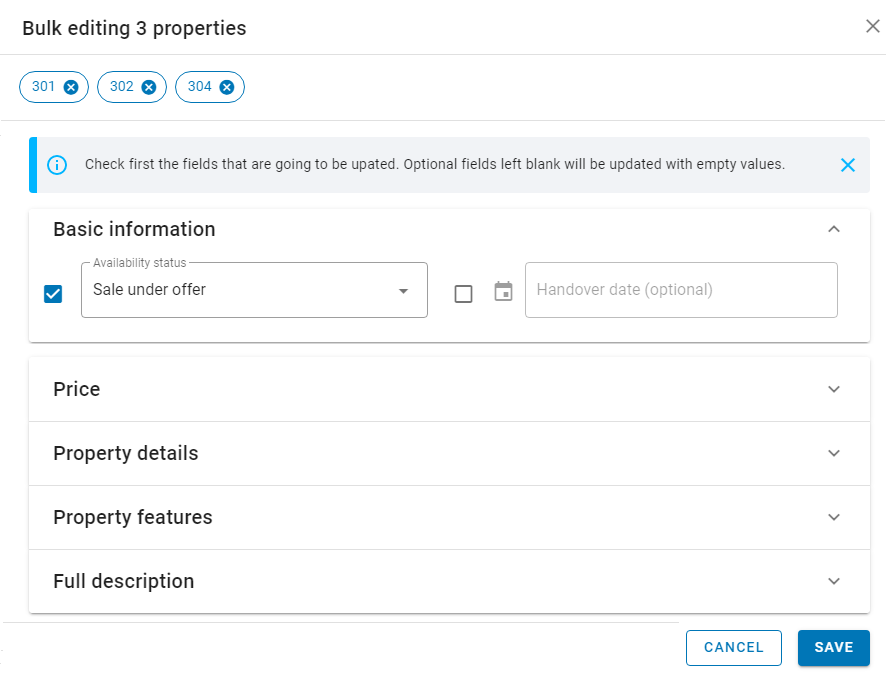
The right behaviour when properties from different schemes are selected, is:
- Display only properties from the scheme of the first property selected, and show an alert about it.

# Clone
This useful option allows you to add a new property based on an existing one. All information is self-filled, and you only need to enter a new number.
To Clone a property, after selecting it click the 'CLONE' button from the Development Properties tab.
# Delete Properties
Once you have selected the property you want to delete, click the 'DELETE' button. This action can not be reversed.
The 'CLONE' and 'DELETE' buttons are only activated when a single property is selected.
# Export to SCV file
By clicking on the three dots that appear to the right of the 'Delete' button, you can see other actions that can be performed, like Export to a CSV file, Import CSV file, Activate, Deactivate, Set eligibility rules and Set priority rules.
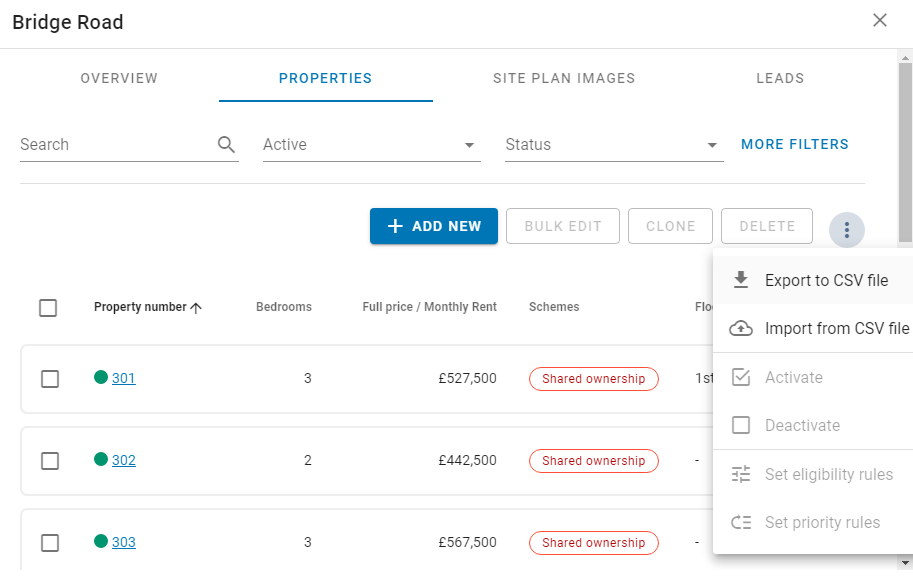
Export to a CSV file, will allow you export all the data of the selected properties to load in external platforms.
# Import from CSV file
From this option you can load your inventory from CSV files.
For a better understanding a separate chapter has been dedicated to Import from CSV file in this guide.
# Activate
From Activate option in the drop down menu, select the properties you want to activate, and click on 'Activate'. From this option, several selected properties can be activated at the same time.
You can also activate a property, by click the switch in Active column of your properties list.
# Deactivate
In the same way as in the activate action, all the selected properties will be deactivated, without having to do it one by one.
You can also deactivate a property, by click the switch in Active column of your properties list.
# Set eligibility rules
From Set eligibility rules option in the drop down menu when you click on the three dots, you can set the eligibility rules that will apply to the selected properties.
- For every scheme only applicable rules are displayed.
A message is displayed when bulk-updating eligibility and the scheme of the first property selected does not allow eligibility.
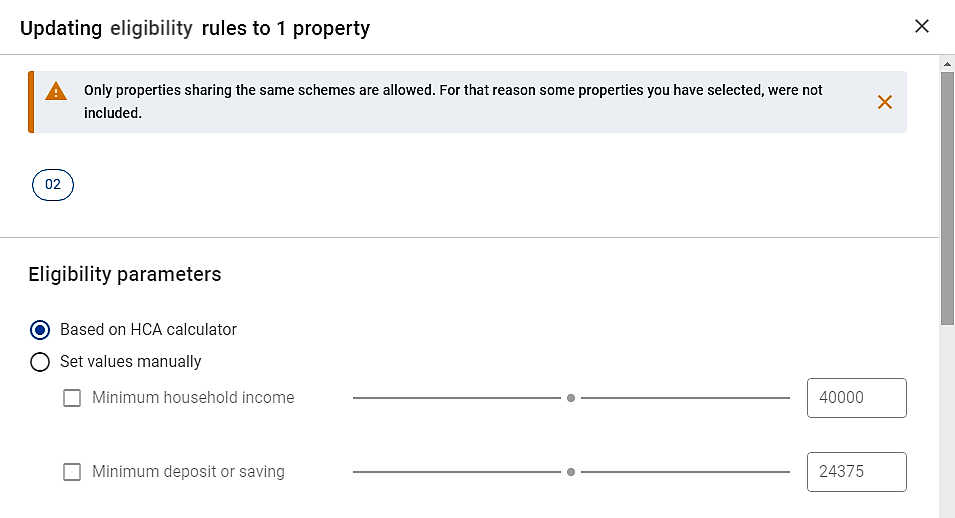
- When there is not income maximum, allow writing any value, even when the slider has a maximum value.
- Allow writing any value in deposit, even when the slider has a maximum value.
- Subjective value for min-income and min-deposit should not be greater than the rule value.
- Calculator default value should be the one used in the next up level (levels are: Platform settings, Housing provider settings, listing, property).
- Only selected rules and parameters are saved and match the overview.
# Set priority rules
You can set priority rules by selecting this menu option when clicking on the three dots.
- For every scheme only applicable rules are displayed.
A message is displayed when bulk-updating priority and the scheme of the first property selected does not allow priority.
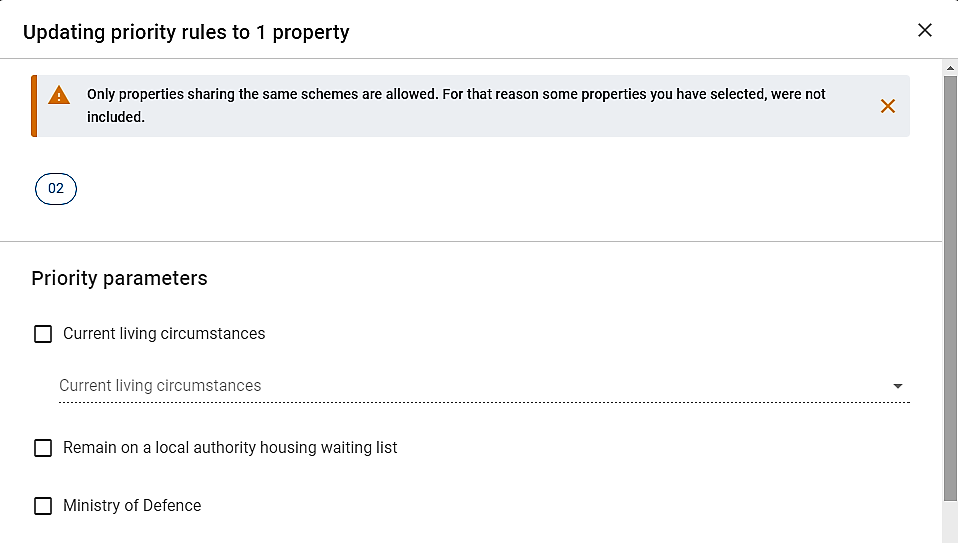
- Only selected rules are saved and match the overview.
The eligibility and priority rules set, are shown in the eligibility&priority tab in Properties.
